Creating Your First NFT Smart Contract on HAQQ Network- A Beginner's Guide
Intro
In the dynamic landscape of blockchain technology, Non-Fungible Tokens (NFTs) stand out as unique digital assets that are transforming the way we think about ownership and exchange in the digital sphere. An NFT is essentially a type of smart contract that represents ownership of a specific, non-interchangeable item, such as artwork, music, or digital collectibles. Each NFT is distinct, with its own set of attributes and metadata that cannot be duplicated, making it truly unique.
Smart contracts, the underlying technology behind NFTs, are protocols written in code that execute automatically when predetermined conditions are met. These contracts are stored on the blockchain, ensuring transparency, security, and integrity in transactions. By leveraging smart contracts, NFTs facilitate the direct and secure ownership and transfer of digital assets without the need for intermediaries.
In this guide, we will delve into how you can create your first smart contact - NFT, ensuring the process is straightforward and accessible, even for beginners. This will provide you with the foundation needed to participate in the burgeoning world of digital assets confidently.
Before start - setup your wallet In this article, you will need an EVM-compatible wallet configured for the HAQQ testedge2 - test network, such as MetaMask or Haqq Wallet.
Follow the Metamask guide for more info on how to setup your wallet account.
You can get free ISLM tokens on HAQQ testedge2 in faucet here
Create smart contract with OpenZeppelin
Founded in 2015, OpenZeppelin is the world leader in securing blockchain applications and smart contracts. Its bedrock open source Contract Libraries are a public good and industry standard for smart contract development. OpenZeppelin’s professional expertise, unified with the Defender developer security platform, integrates through clients’ development lifecycles, so teams can plan, code, audit, deploy and operate projects faster and more safely.
- Open - OpenZeppelin - https://wizard.openzeppelin.com/
- Select ERC721 - NFT
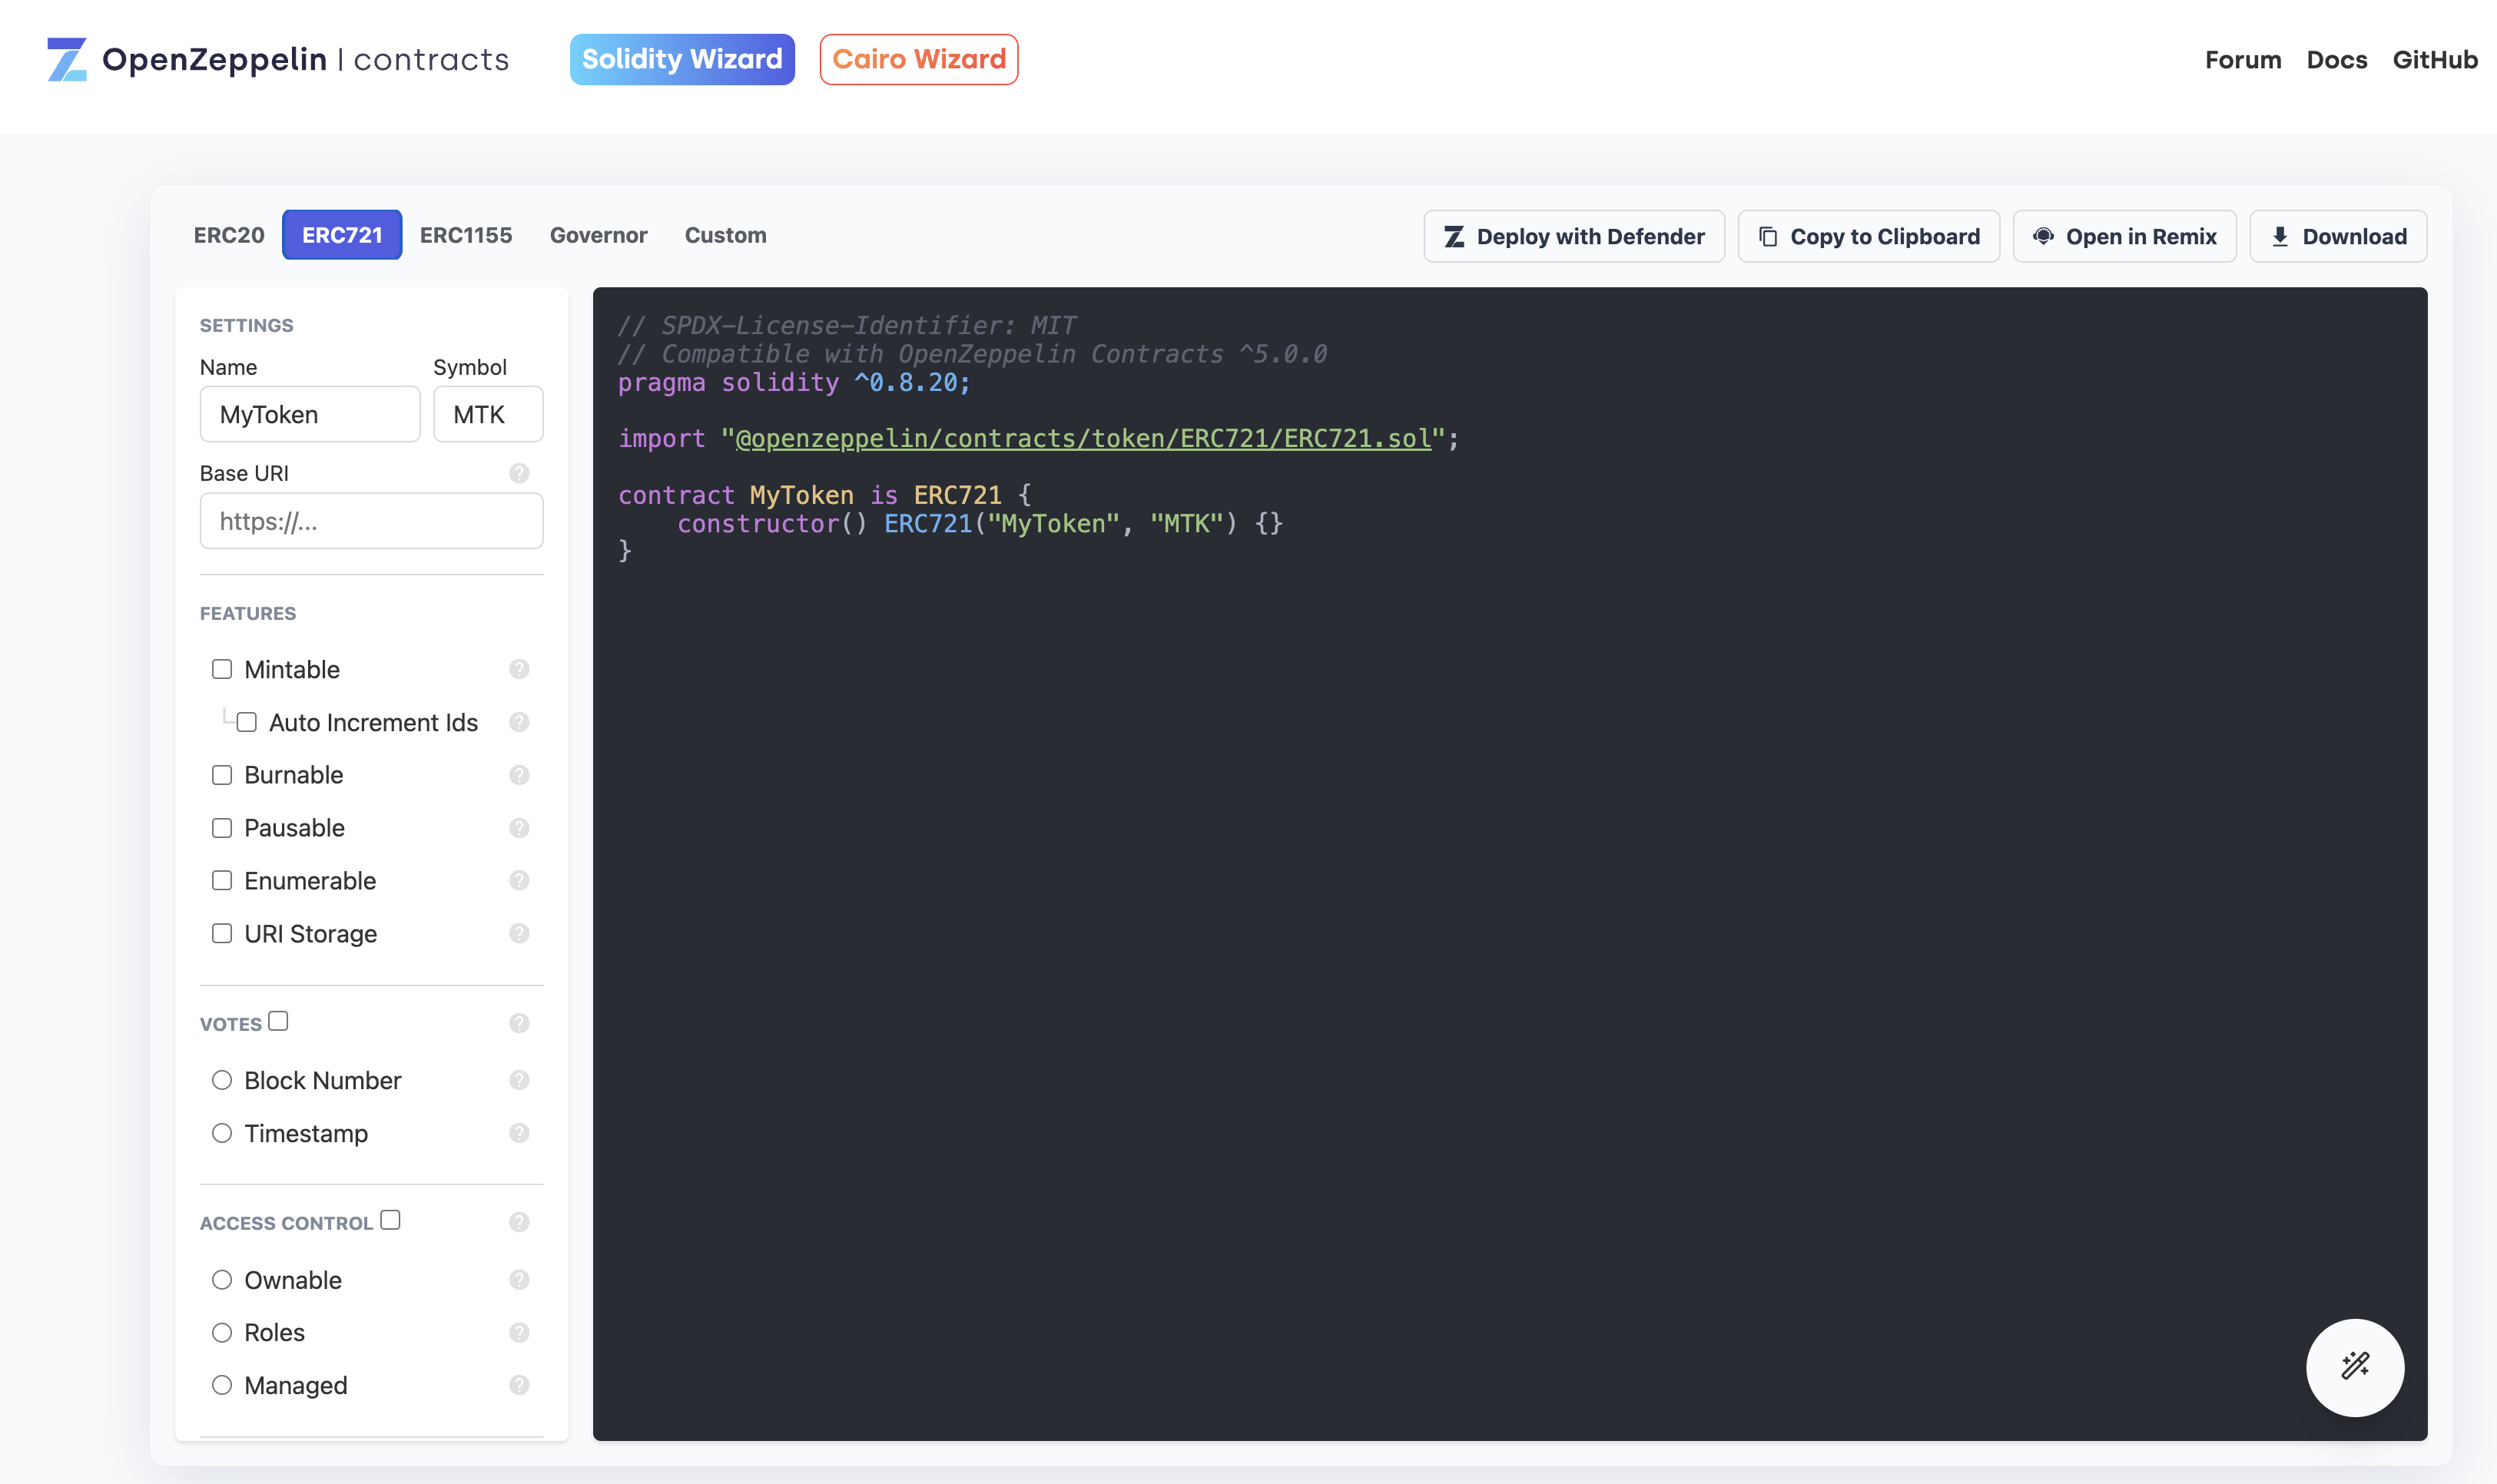
- If you want the NFT to be with an image or metadata, select - URI Storage
- If you want mint NFT after deploy, select - Mintable, and ease way - Auto Increment Ids
- Allow users to delete - Burn
- Set your Name and Symbol
- Can other users mint - delete onlyOwner? Or just the author? - stay safe with onlyOwner
- Cool - Your smart contract Created
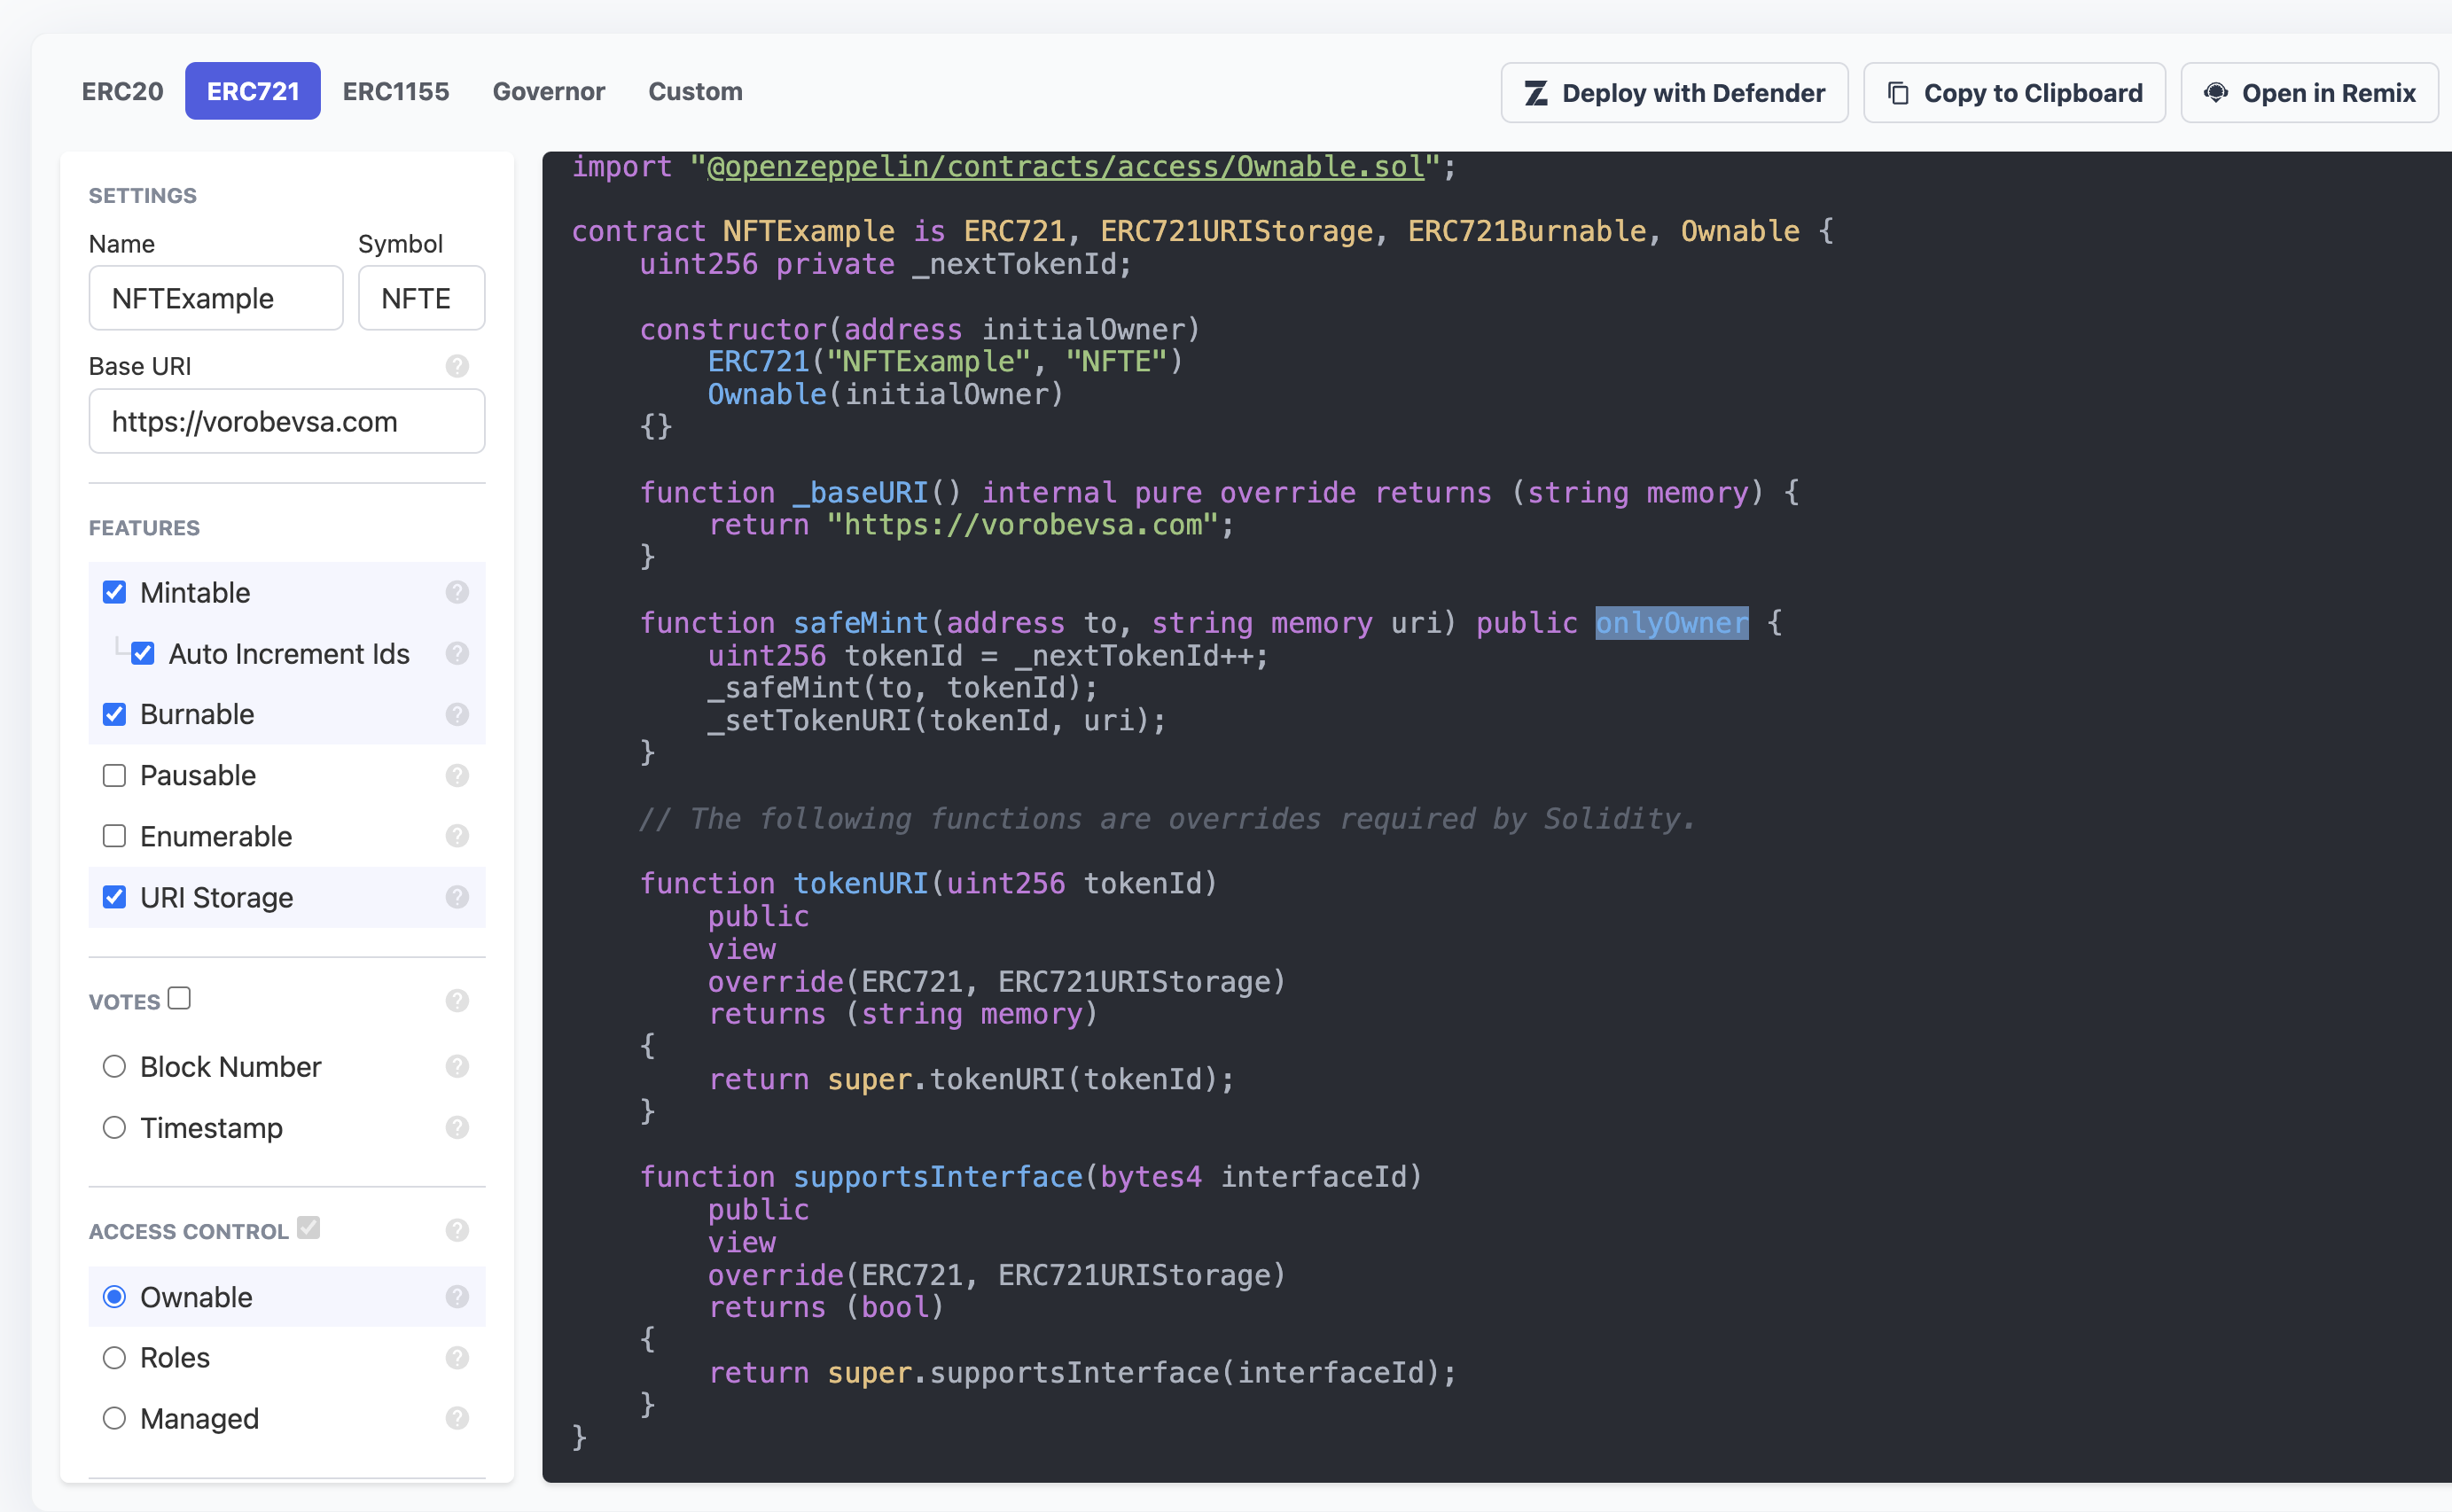
As you may have noticed, thanks to the libraries from OpenZeppelin and their contract wizard, you can create new contracts with just a few clicks of the mouse. This is incredibly convenient and provides a foundational level that you can build upon with your own custom logic. For example, you could allow minting by anyone but introduce a minting fee that is directly transferred to the contract creator.
Example of NFT smart contract code
// SPDX-License-Identifier: MIT
// Compatible with OpenZeppelin Contracts ^5.0.0
pragma solidity ^0.8.20;

import "@openzeppelin/contracts/token/ERC721/ERC721.sol";
import "@openzeppelin/contracts/token/ERC721/extensions/ERC721URIStorage.sol";
import "@openzeppelin/contracts/token/ERC721/extensions/ERC721Burnable.sol";
import "@openzeppelin/contracts/access/Ownable.sol";

contract NFTExample is ERC721, ERC721URIStorage, ERC721Burnable, Ownable {
    uint256 private _nextTokenId;

    constructor(address initialOwner)
        ERC721("NFTExample", "NFTE")
        Ownable(initialOwner)
    {}

    function _baseURI() internal pure override returns (string memory) {
        return "https://vorobevsa.com";
    }

    function safeMint(address to, string memory uri) public onlyOwner {
        uint256 tokenId = _nextTokenId++;
        _safeMint(to, tokenId);
        _setTokenURI(tokenId, uri);
    }

    // The following functions are overrides required by Solidity.

    function tokenURI(uint256 tokenId)
        public
        view
        override(ERC721, ERC721URIStorage)
        returns (string memory)
    {
        return super.tokenURI(tokenId);
    }

    function supportsInterface(bytes4 interfaceId)
        public
        view
        override(ERC721, ERC721URIStorage)
        returns (bool)
    {
        return super.supportsInterface(interfaceId);
    }
}
Deploy with Remix
The next step will be to compile the smart contract code and deploy it to the network. For this, we will use the functionality provided by Remix. Additionally, you will need to connect your EVM wallet to Remix.
Remix IDE is part of the Remix Project, a rich toolset that can be used for the entire journey of contract development by users of any knowledge level. Remix IDE is used for the entire journey of smart contract development by users at every knowledge level. It requires no setup, fosters a fast development cycle, and has a rich set of plugins with intuitive GUIs. The IDE comes in two flavors (web app or desktop app). We will use Remix Online IDE, see: https://remix.ethereum.org
We strongly recommend using a separate wallet for development purposes from the wallet where your assets are stored.
- In OpenZeppilin click - Open in Remix
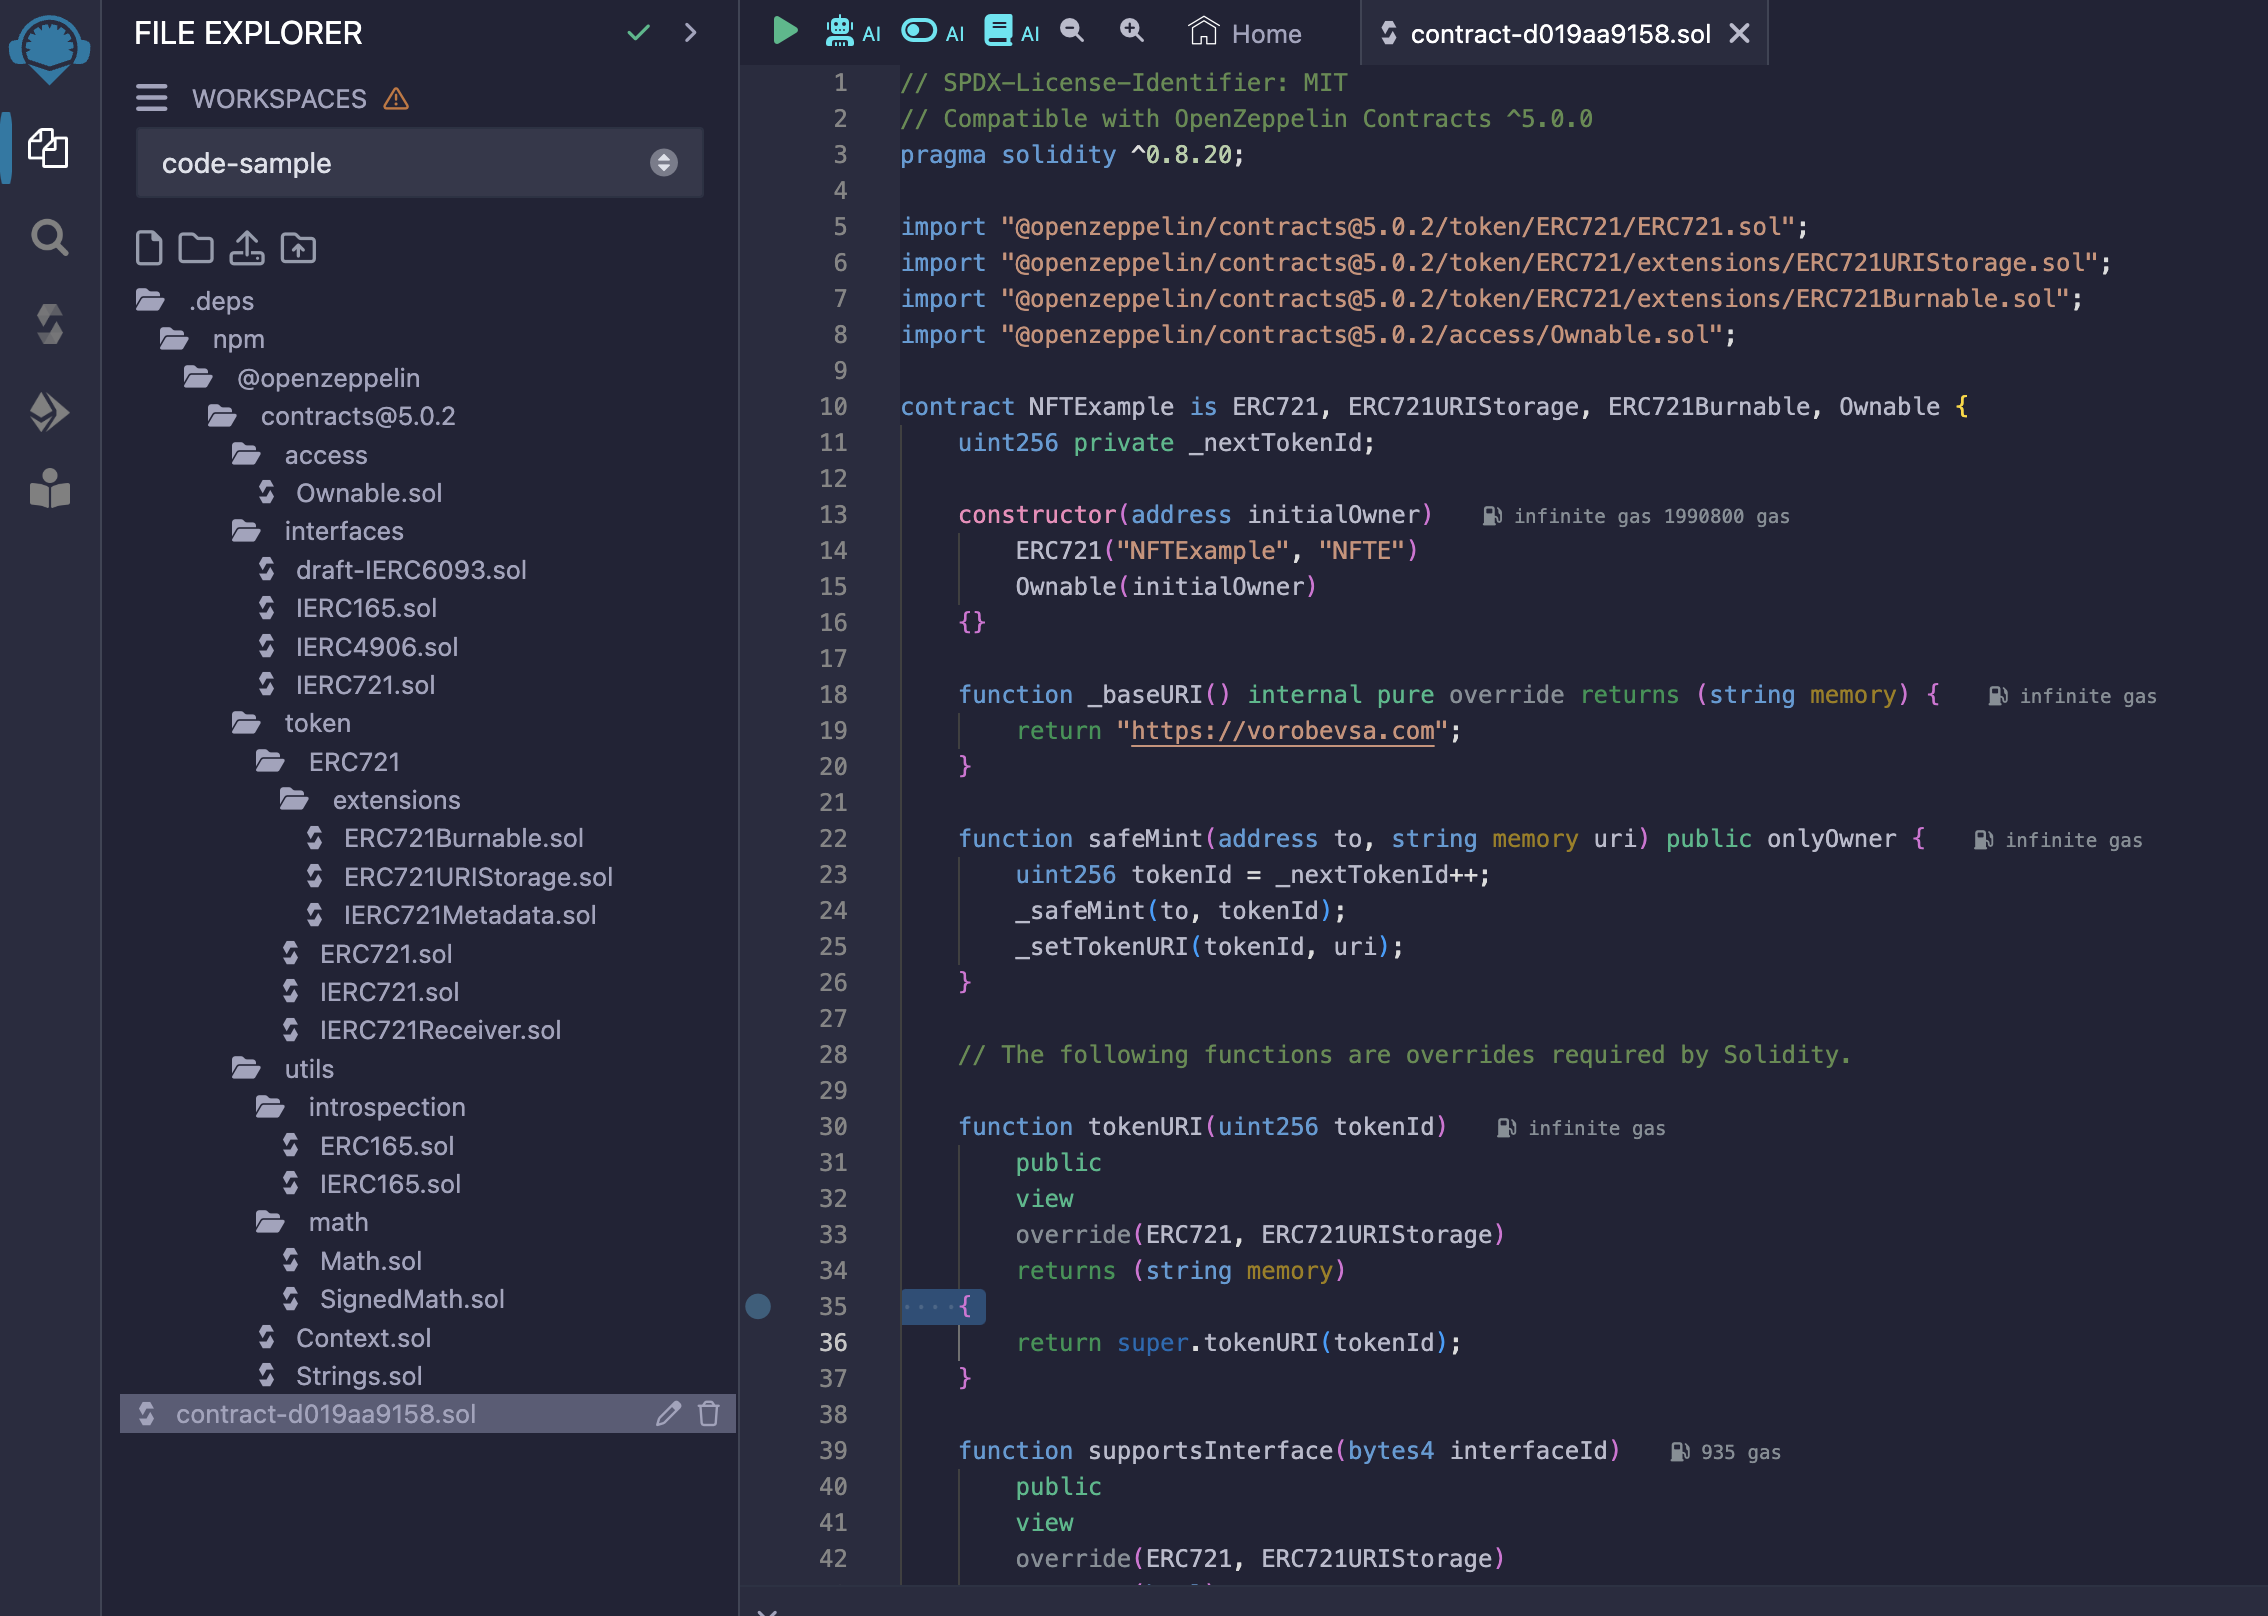
- Config Solidity Compiler - Select Solidity 8.20 and EVM compile Paris
We recommend using Solidity 8.19 but to simplify the example now, choose 8.20
Must use - EVM compile Paris
 3. Compile contract - click on Compile button
4. Go to - Deploy & run transactions
5. Connect your wallet
6. Select HAQQ Testedge2 network in your wallet.
7. Set up inichial owener - your wallet addr
3. Compile contract - click on Compile button
4. Go to - Deploy & run transactions
5. Connect your wallet
6. Select HAQQ Testedge2 network in your wallet.
7. Set up inichial owener - your wallet addr
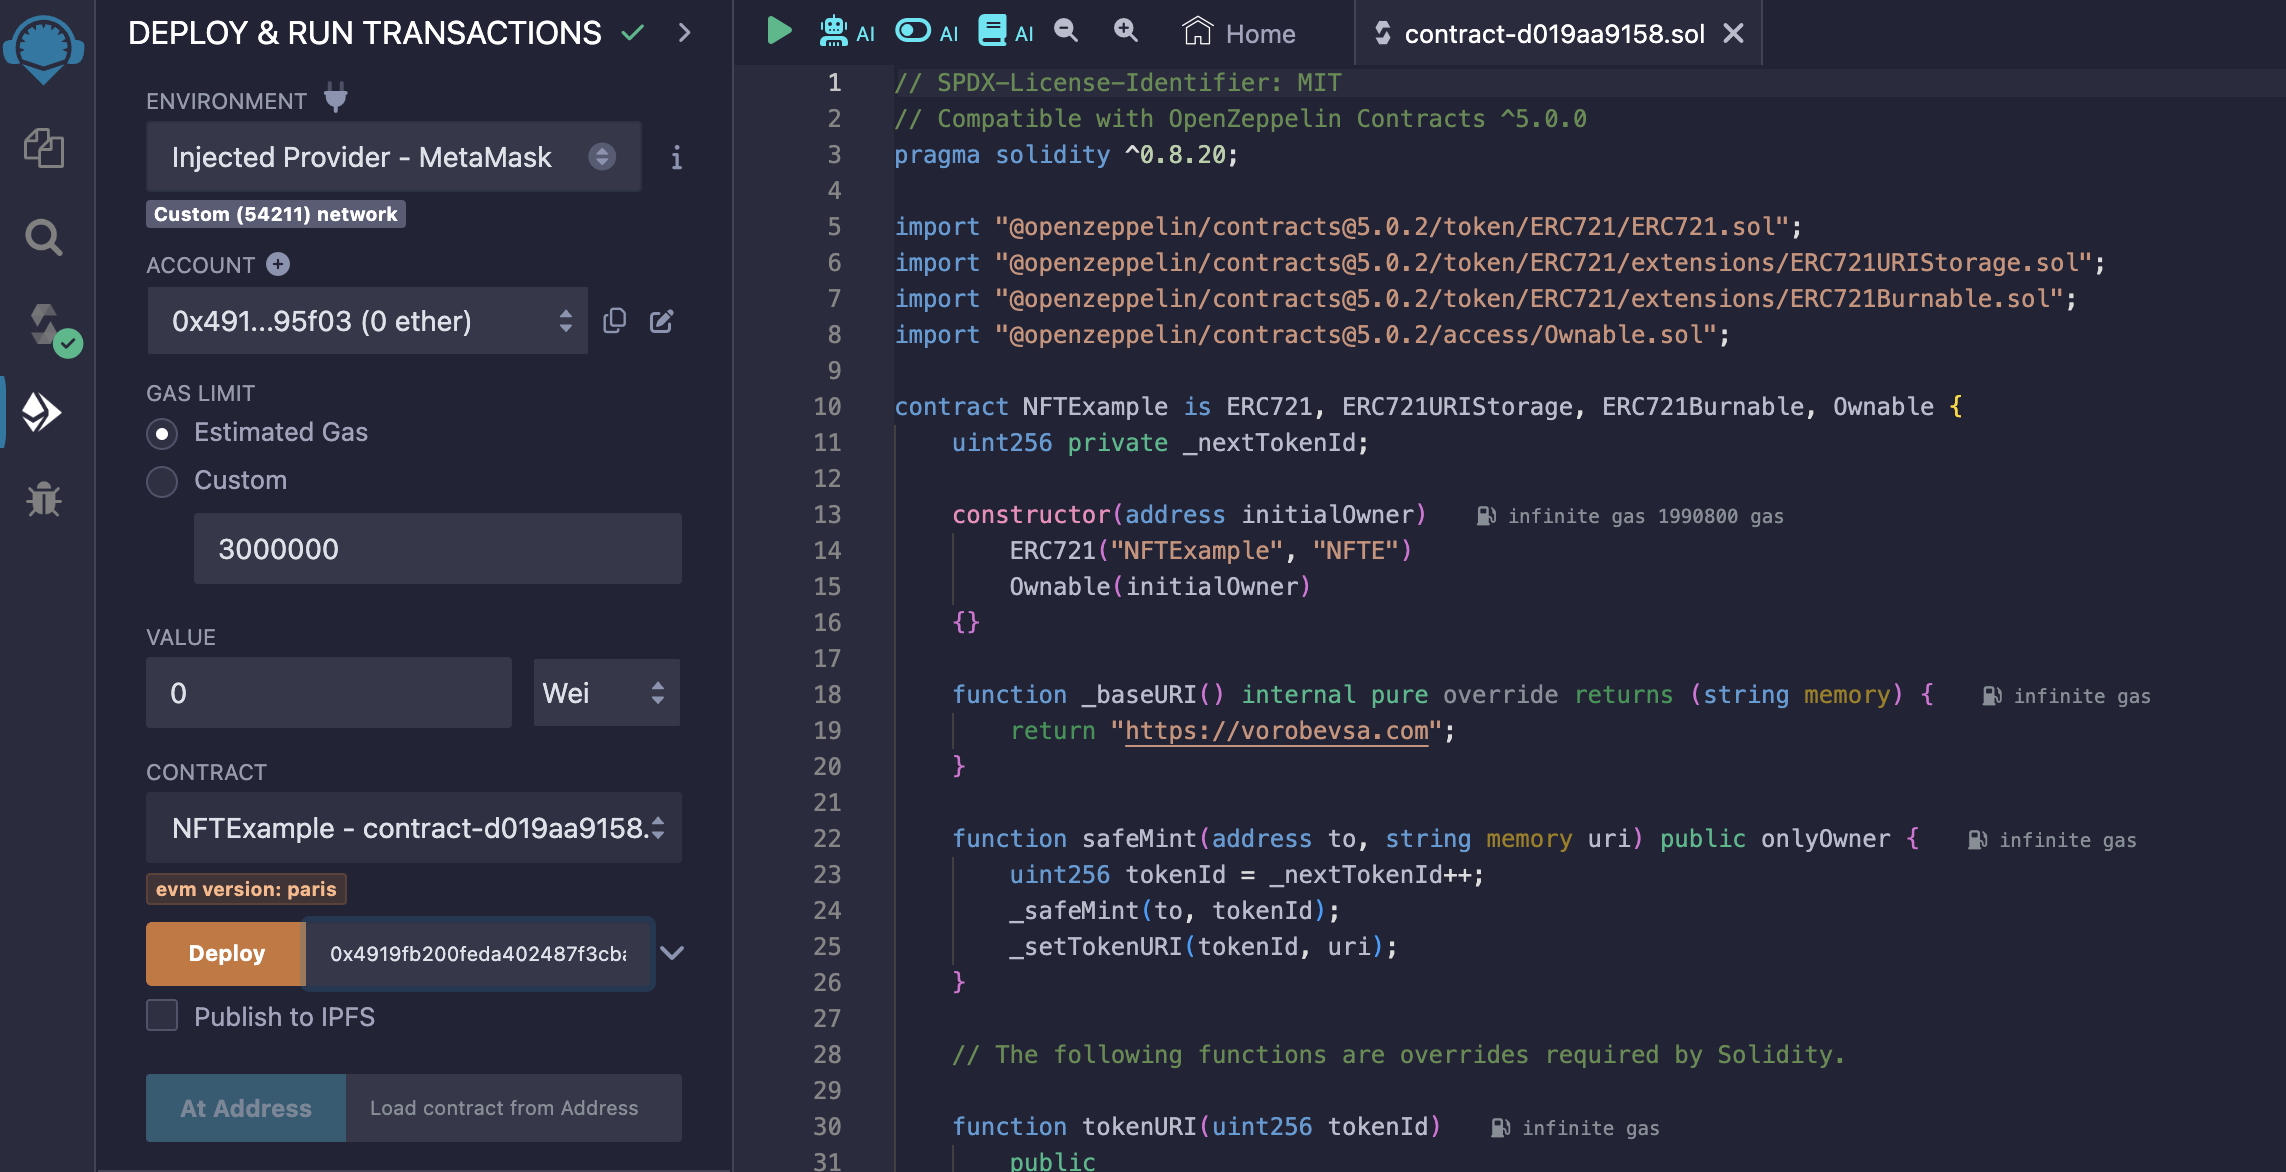 8. Click on Deploy
9. Confirm TX
8. Click on Deploy
9. Confirm TX
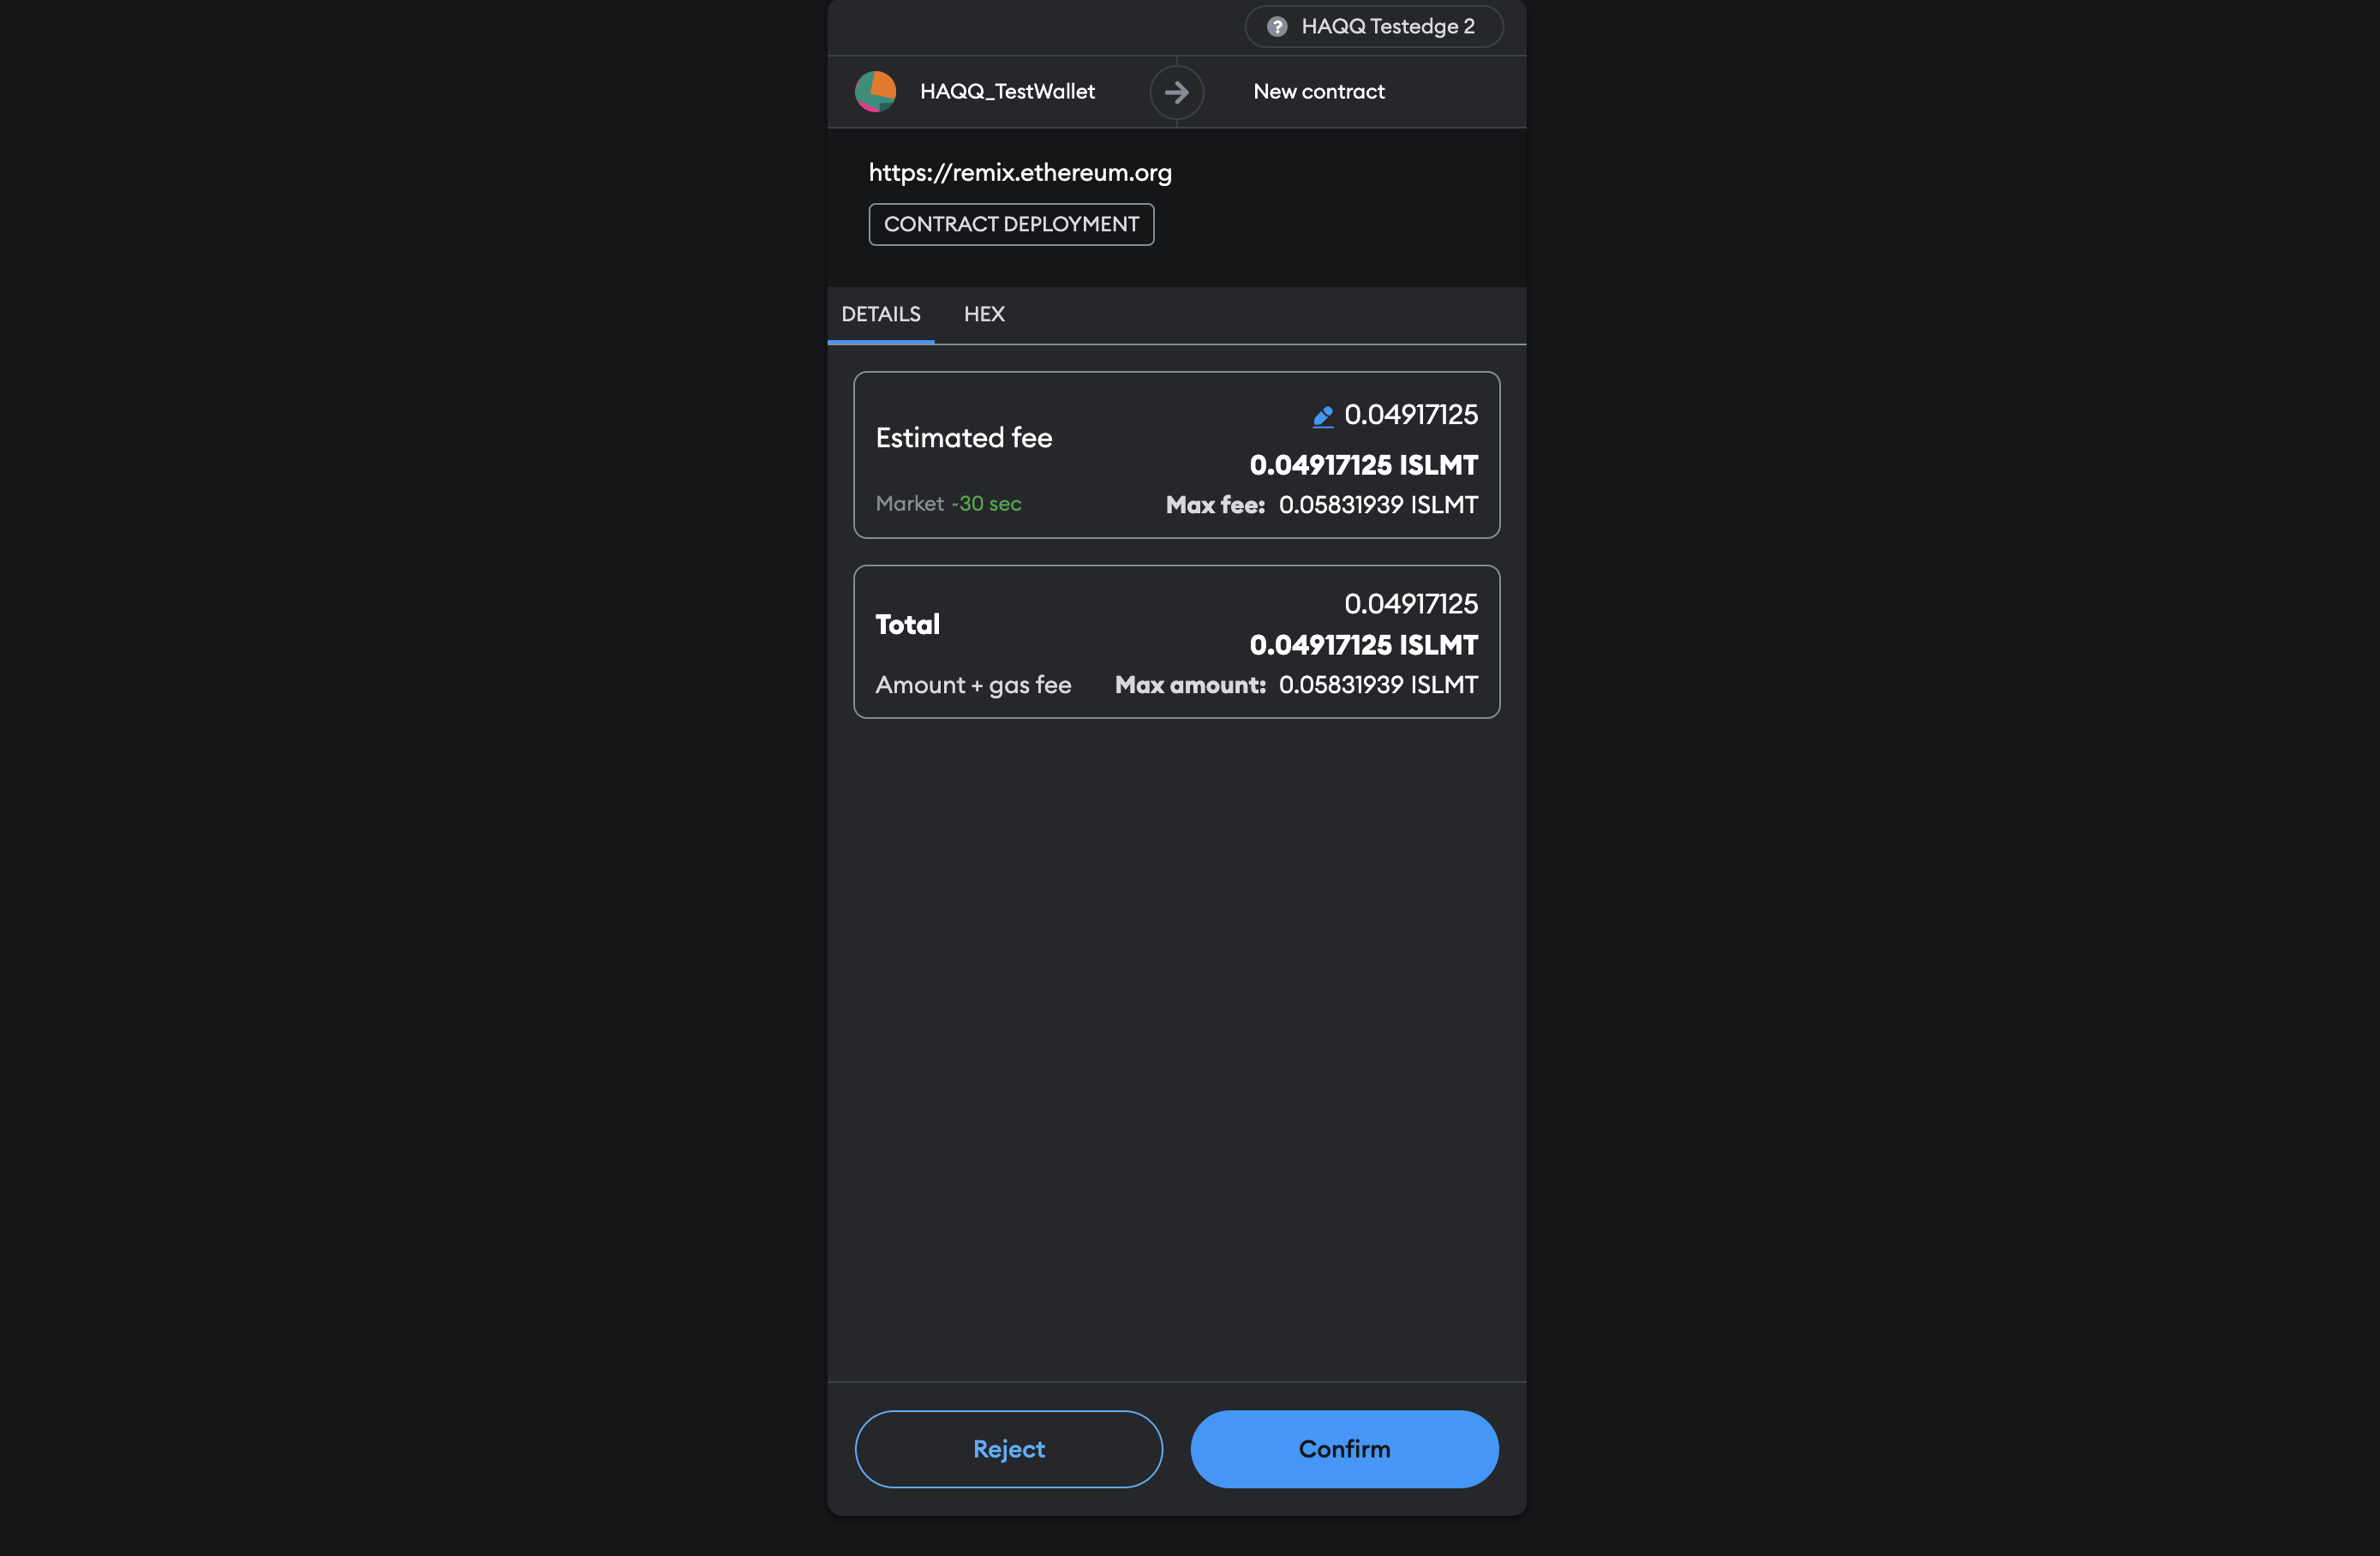 10. See tx status
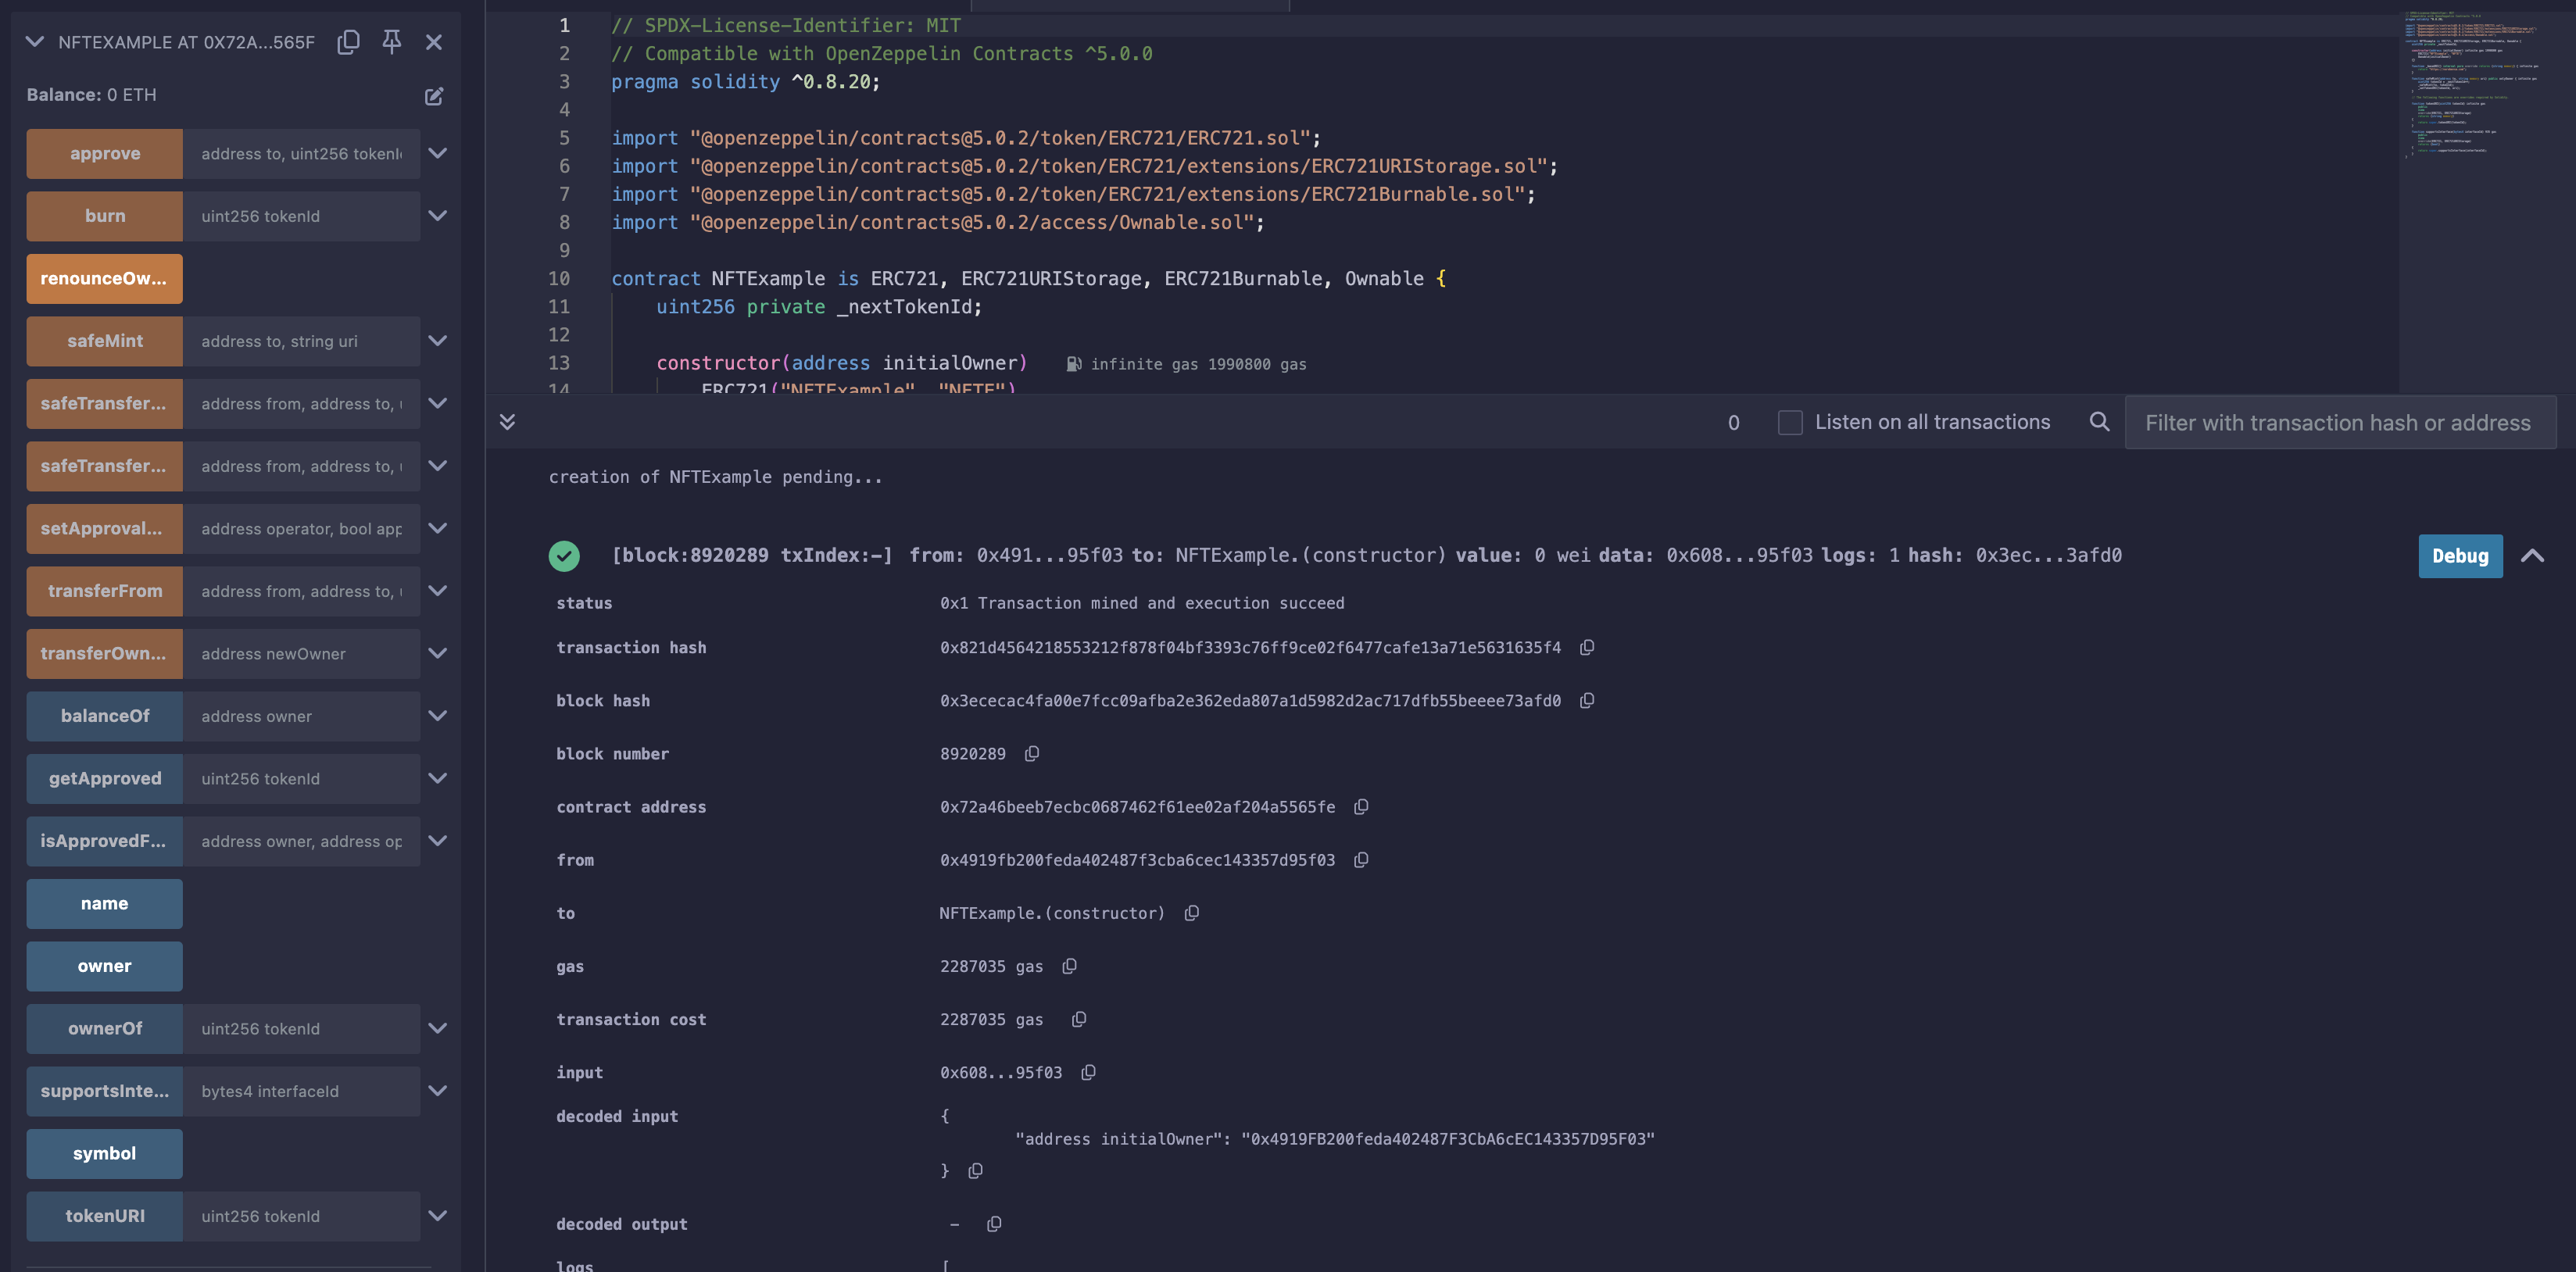
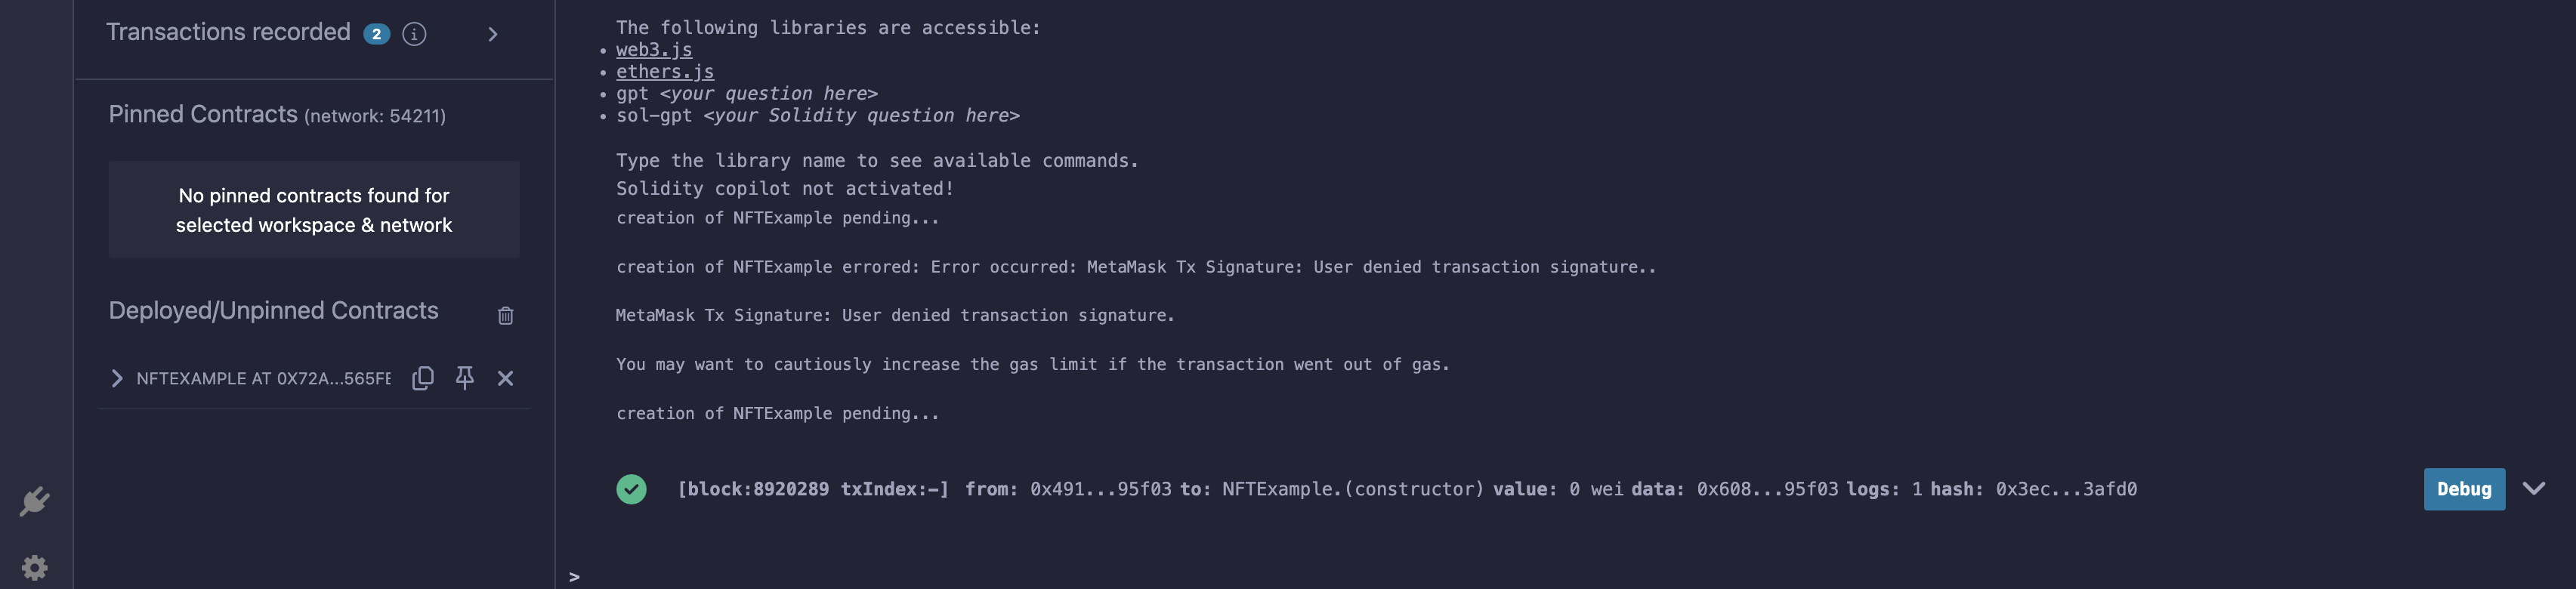 11. Cool - Your contract Deployed.
12. You can see in interface your contract addr and now we start interact with your contract on haqq chain
11. Cool - Your contract Deployed.
12. You can see in interface your contract addr and now we start interact with your contract on haqq chain
Mint with Remix
Remix is not only a tool for compiling and deploying contracts; you can also interact with and debug contracts on the network using it. Let's go ahead and release your first NFT through your own smart contract.
- See your smart contract available methods
- Open Mint methods
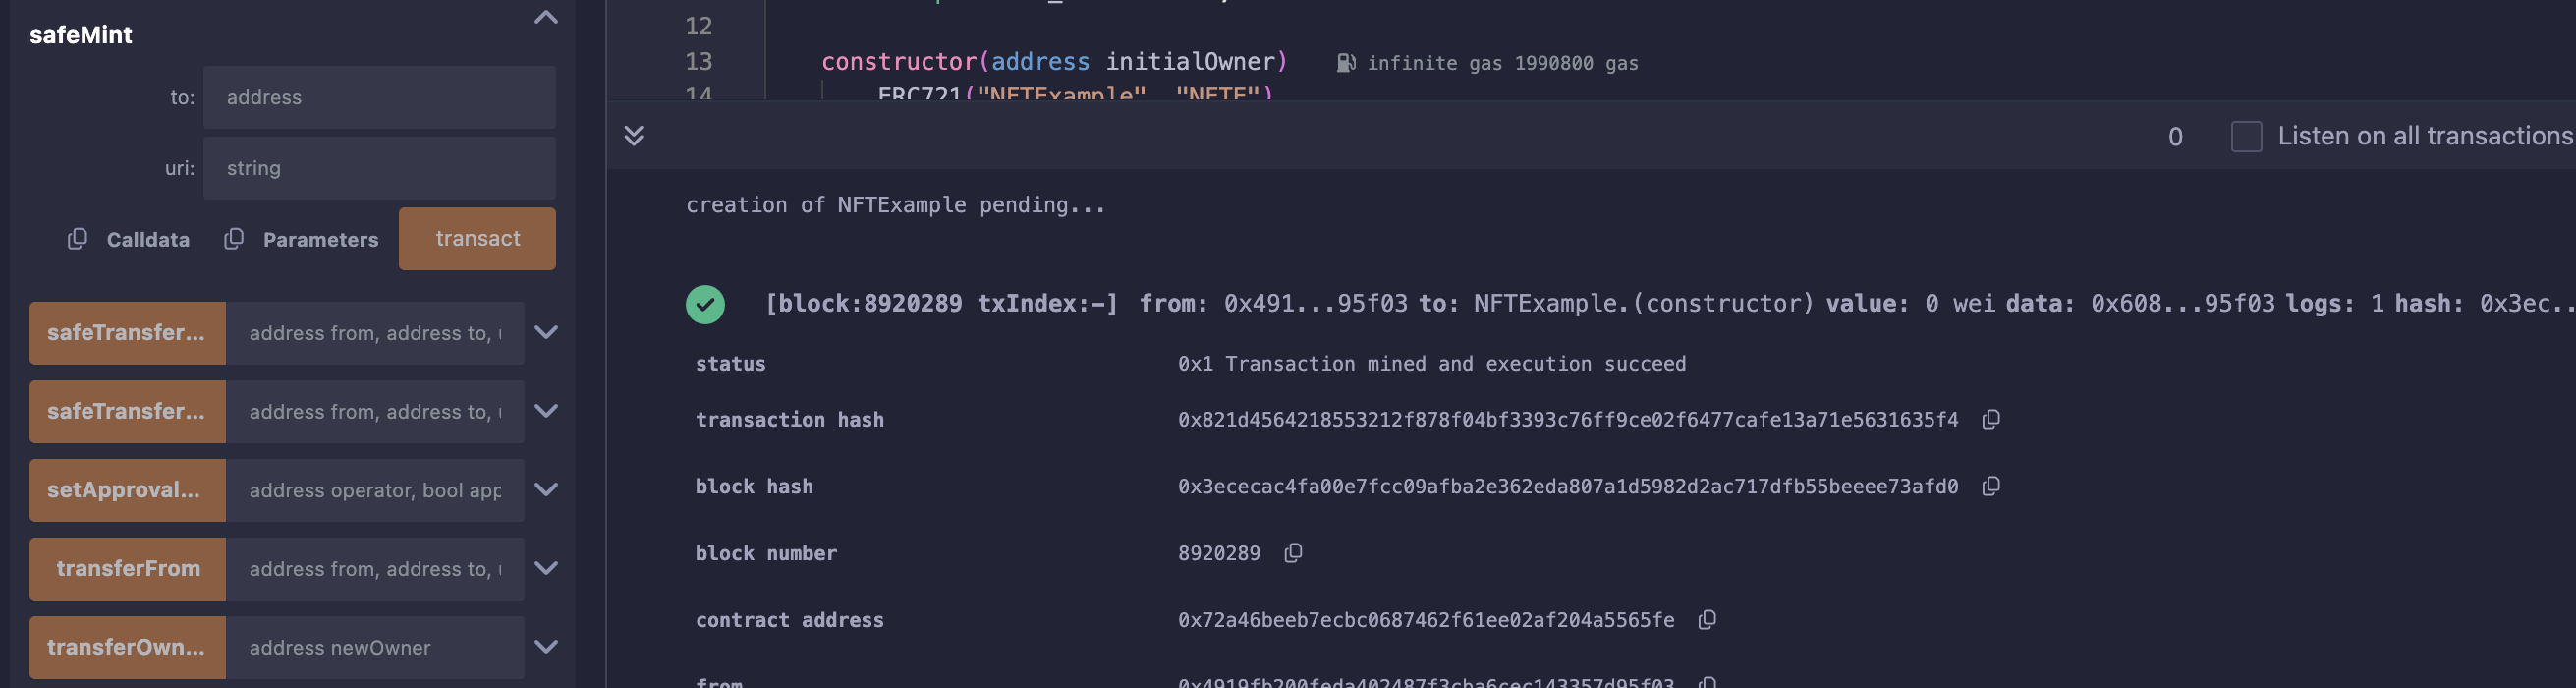
- Setup mint
- to address insert your address
- url - paste the image address with the base url in mind - what does that mean - the path to the image should be BaseUrl + Url - for example the link to the image is https://vorobevsa.com/haqq.png BaseUrl = https://vorobevsa.com - then the url is /test.png
- Transact
- Sing TX
- Use method token URI and see your link from NFT

- Seath TX by hash in explorer for HAQQ TestEdge2

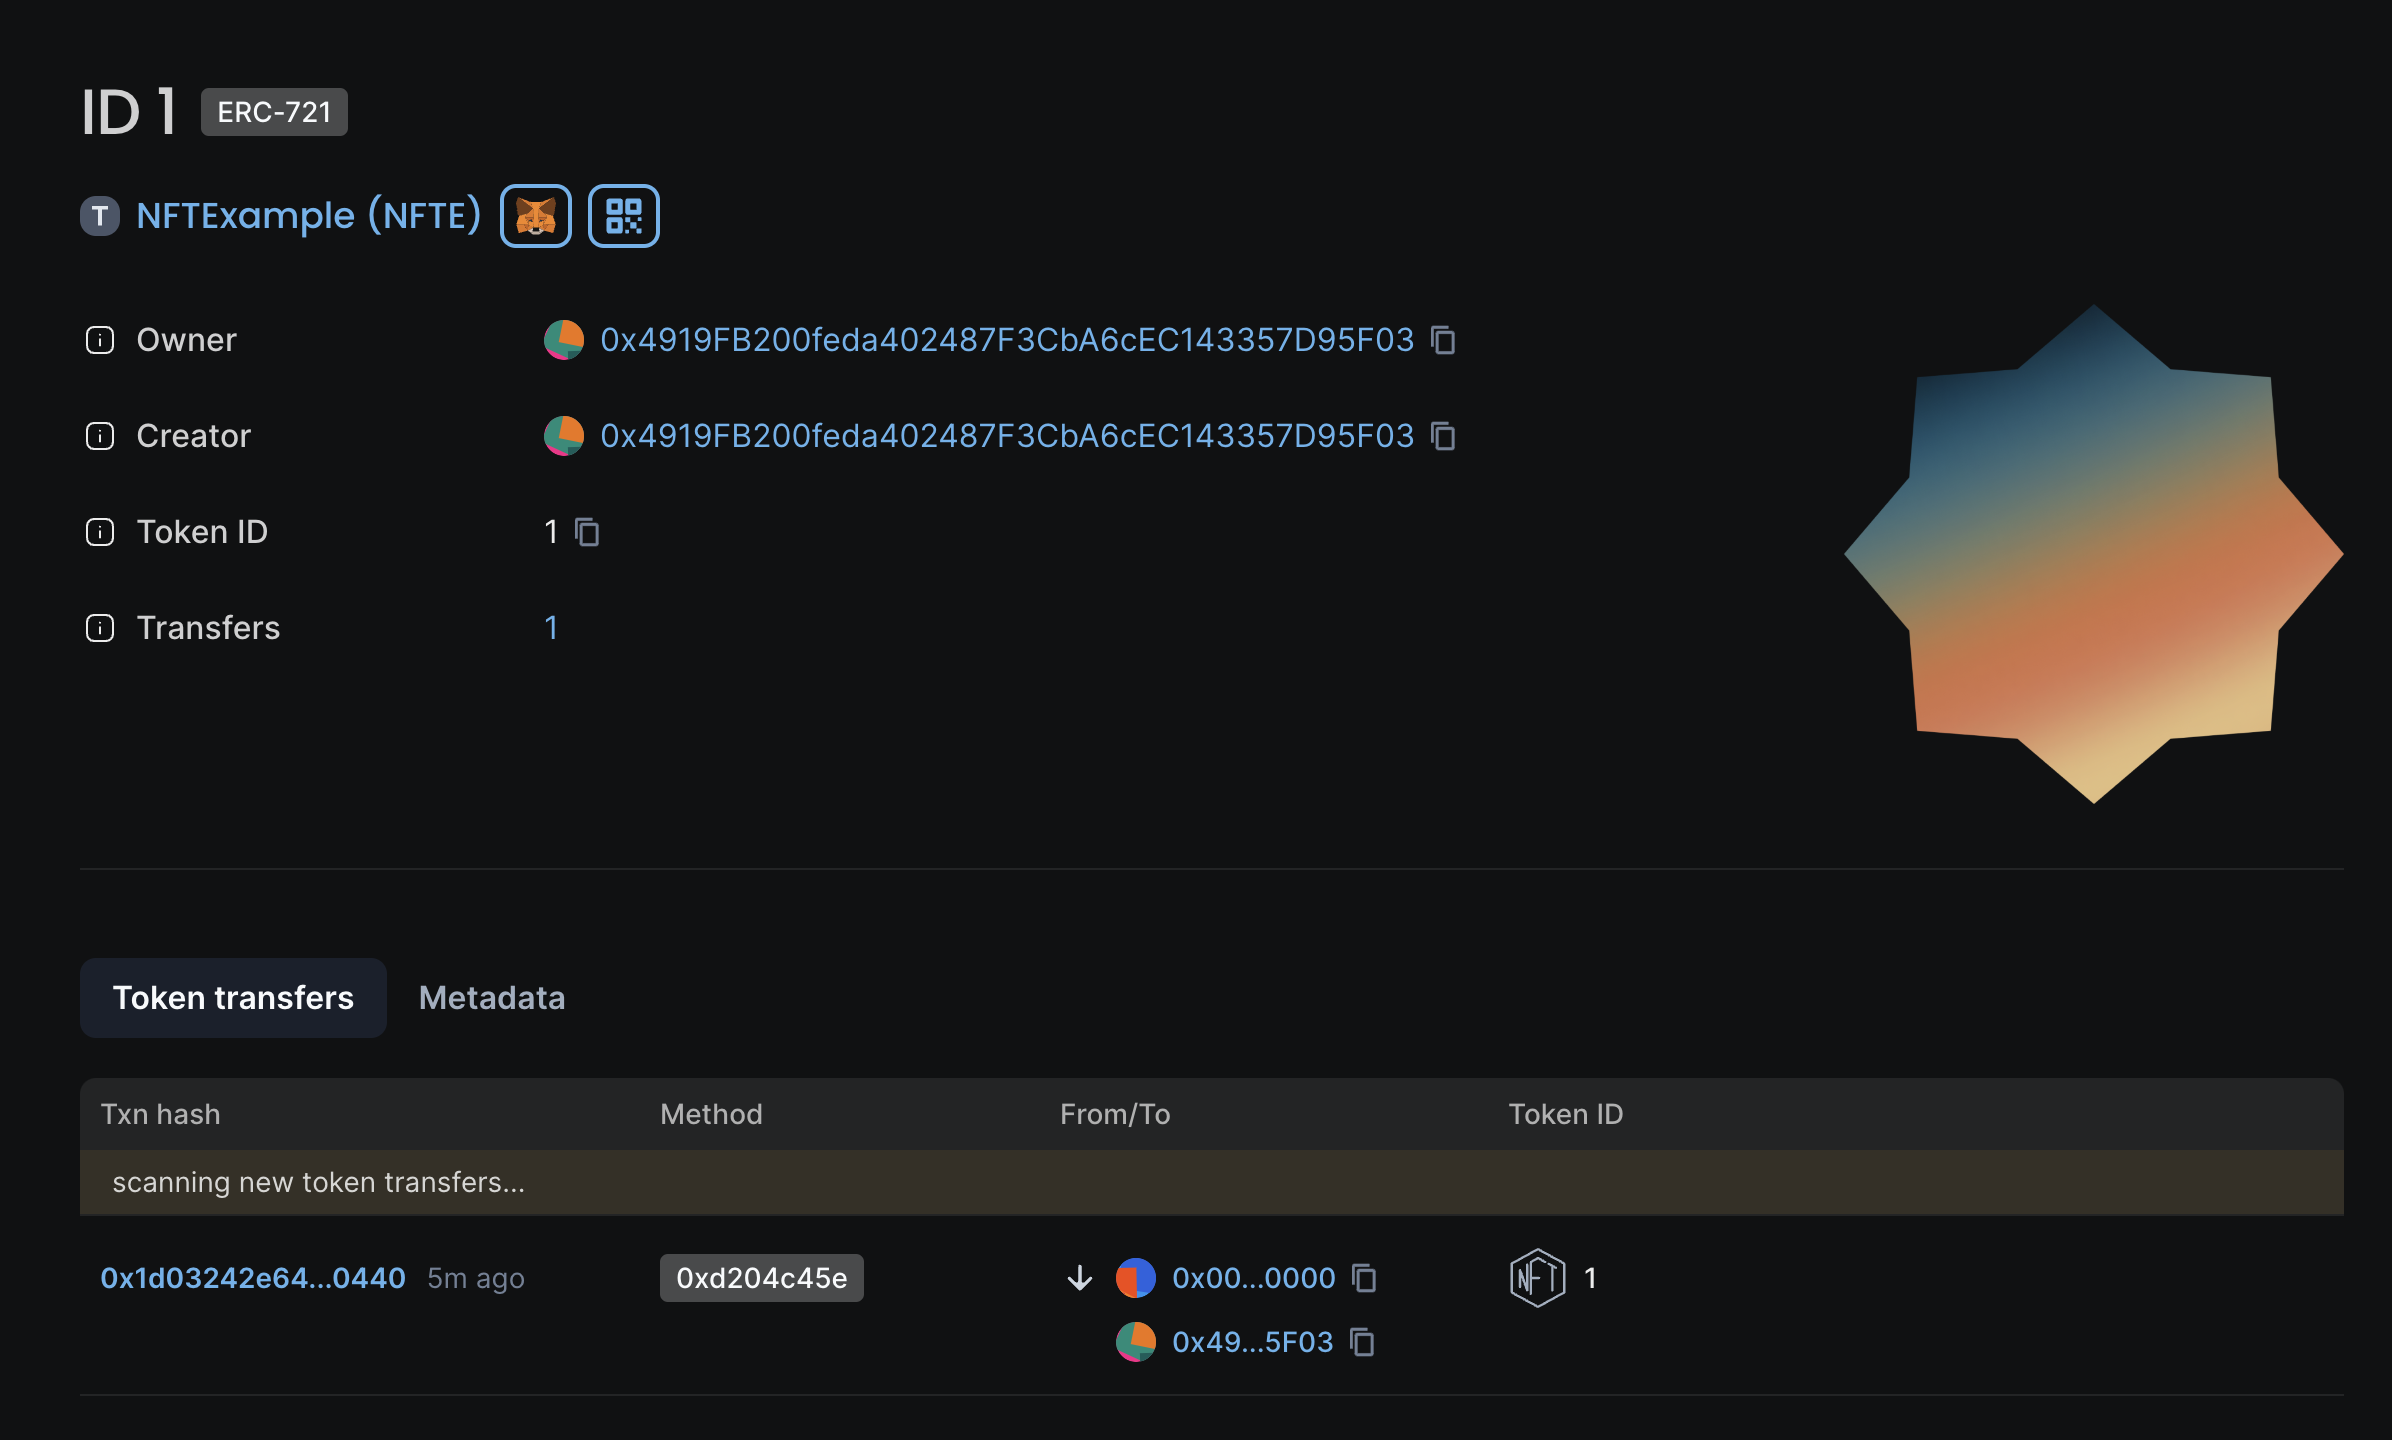
- Click on your token id - 1 in example

- See your token and image
Next steps
Here's what you can study next:
- NFT Metadata:In the example, we considered that TokenURI immediately returns an image, this is the simplest example, but the best application would be to use NFT Metadata. If you will use Metadata - The TokenURI does not directly deliver an image, but a JSON file containing metadata. This metadata can include not only a link to the image but also a wealth of information about the NFT and its applications. A good article on metadata is available on OpenSea metadata-standards. For example, on our network, check out the NFT "Fruits of Jannah".
- Changing Smart Contract Logic: By modifying the smart contract, you can make minting paid or add new functionalities. For instance, you can transform NFTs into SBT (Soulbound Tokens) by restricting the transfer function. Here’s a detailed article about SBT - Understanding Soulbound Tokens(SBTs), and HAQQ Crypto Academy Certificate as an example from our network.
- Future Developments and Applications of NFTs: The further development and application of NFTs are limited only by your imagination. We are excited to see new uses for NFTs on our network and encourage you to explore innovative ways to leverage this technology. Your creativity could lead to the next big advancement in the world of digital assets.